Table of Contents
"System colors" are set by command line switches. The default is black on a white background.
From the Menu Configure/Defaults select the menu item Colors and Fonts and then select one of the following tabs.
Text Ctrls

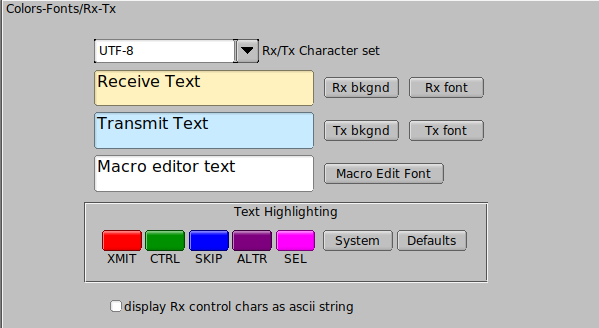
The initial color, font and font-size for the Rx and Tx panel are the default values. You can always return to these by pressing the Defaults button. The background color, font and font-size are independently selectable. The Rx panel displays text in one of 5 colors:
- normal received text - "Rx font" button
- transmitted text - XMIT button
- control characters - CTRL button
- skipped characters (Tx ON/OFF in Tx pane) - SKIP button
- quick view characters - ALTR button
- select text highlight - SEL button
The text widget used for Rx, Tx and Event log displays has been improved to give better performance with proportional fonts. Fixed width fonts still give better performance and are not as demanding on the cpu. There are several very good fixed width fonts that include a slashed zero which are available for both Windows and Linux. If you are using a proportional font and find that the Rx text display gets unresponsive with large amounts of text then you should change to a fixed width font. Do a search on the internet for "Andale Mono" or "Consolas". Both are excellent fonts for this use.
Character Set Selection

This setting affects how fldigi encodes the text that it transmits and how it interprets what it receives. This mainly matters if you intend to transmit and/or receive text containing characters that are not in the English alphabet (for example letters with diacritics, Cyrillic letters, Japanese script and similar). Successful transmission and reception of such symbols is only possible if both your and the correspondent's program are set to use the same encoding. Seeing "strange" characters instead of what you would expect for example "č" always turning up as "è" indicates that there is probably a mismatch between your encoding and the correspondent's.
Leaving this control set to UTF-8 (the default) is strongly recommended as this is a cover-all encoding that enables communication in almost any language and script imaginable. However, there are three cases in which you might want to switch encodings (at least temporarily):
-
You never expect to transmit or view any character except for the lower 128 characters (ASCII) of the ANSI data set. This might be true for English to English communications in which you do not want to have decoded noise appear as UTF-8 character renditions.
- You want to communicate using non-English characters, but the correspondent's program does not support UTF-8. In such a case, you should find out what encoding the correspondent is using and change your setting accordingly.
- You expect to exchange a lot of traffic that mostly consists of non-English characters (communication in Cyrillic script being a notable example). UTF-8 encodes each non-English character into a symbol two to four bytes long. Such characters require more time to transmit and thus reduce the effective transmission speed. Choosing another encoding that requires less bytes to be sent might be beneficial if the transmission speed is crucial. For example, a pair of operators wanting to communicate in Cyrillic script might want to choose CP1251 to retain the maximum transmission speed.
Warning: transmission of non-English characters, regardless of the encoding used, requires that the digital mode used be capable of handling 8-bit traffic. The following modes suit this requirement:
- DominoEX
- MFSK
- MT63 (8 bit extended characters must be enabled)
- Olivia (8 bit extended characters must be enabled)
- PSK (all variants)
- THOR
Frequency Display

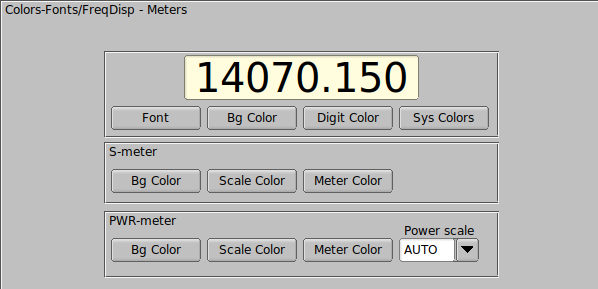
The rig control panel uses a special button for each digit the represents the transceiver frequency. The buttons are responsive to mouse clicks on the upper and lower half with corresponding changes it that unit's value. Unit value is also controlled by the mouse wheel when the cursor is over a particular digit. Select the background and foreground colors to please your overall color scheme and for best visual acuity. The System colors are the same ones that are used by all input and output text controls.
Logging controls

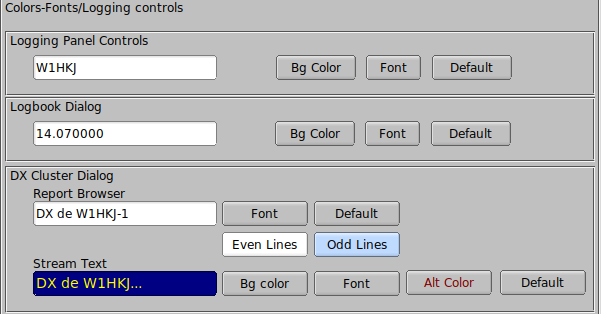
You can select the background color, the font, the font color and the font size for both the logging controls on the main dialog and the separate logbook dialog.
Func keys

You can color code the macro (function key) buttons in groups of 4, F1-F4, F5-F8, and F9-F12. The background color for each group is adjusted by clicking the respective Bkgnd button. The text color for the button labels is adjusted by clicking on the Label Txt button. The colors will change on these buttons and also on the main dialog as you make these adjustments. The Defaults button restores the colors as shown in this view.
Tab Colors

Adjust the color of all tabs to suit your personal taste.
Light Buttons Colors

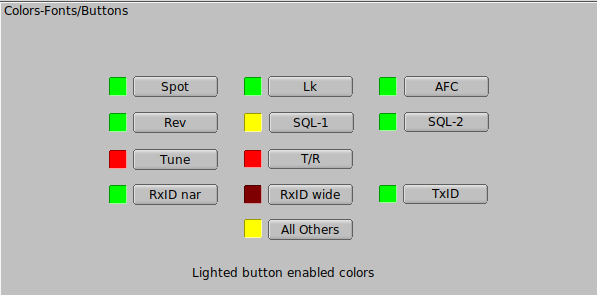
- Adjust the "on" color of Spot, RxID, TxID, Tune, Lk, Rev, T/R and AFC button
- Adjust the "enabled" and "on" colors of the Sql button
Signal Level

You can select the low/normal/high/over-drive colors for the diamond signal level in the lower right hand corner of the main dialog.
.

Your audio Rx level should be set to allow the loudest signals to drive the indicator into the yellow and never into the red zone.